You will also want to research the best times to start your seeds for your area. A great resource is "The Old Farmer's Almanac"--you just enter in your location and it gives you the best planting dates and the best moon-favorable dates. Also, Mother Earth News has What to Plant Now by region.
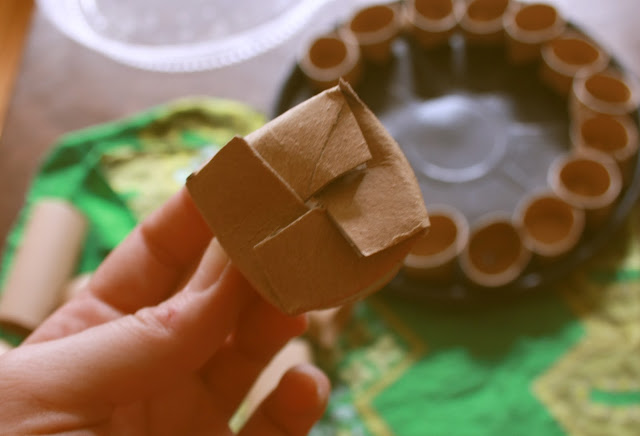
I wanted to try growing seeds in reused and/or biodegradable containers this year. So I have been collecting toilet paper tubes, egg cartons, and plastic food containers. I am also going to use compost instead of potting soil. This should reduce the need for fertilizing.
Today I am starting broccoli, spinach, lettuce, kale, onion bulbs, parsley, sage, thyme, and some flowers I want to try. Later in March, in addition to more of the previous, I will start some peppers, tomatoes, eggplant, chard, cauliflower, basil, cilantro, and dill.
Supplies:
- Containers/pots - toilet paper tubes(see tutorial), egg cartons, plastic food containers (all need to have drainage holes in the bottom)
- Leak-proof tray to put under containers
- Something to label your seeds (popsicle sticks, shaved sticks, painted pebbles...etc.)
- Sifted compost or another seed starting medium
- Transparent cover to keep in humidity and still let in light (reuse and cut plastic bottles, plastic food container lids, plastic bags, large jars, bell jars, etc.)
- Spray bottle
- Punch holes in the bottom of your containers.
- Place containers in a leak-proof tray or larger container.
- Fill containers with compost or seed starting medium.
- Wet the planting medium.
- Sew seeds according to seed packet directions.
- Cover with transparent cover.
- Set in a warm sunny spot.
- Keep moist with spray bottle (or water from the bottom) and wait for sprouts!
If the condensation inside the cover is forming droplets, there is too much moisture. Just take it off for a couple hours to let it air out.
Something else you should consider is the lighting for your seeds. As soon as the seeds have leaves they are ready to soak up the sun. If your house is like mine, where the light diminishes as the surrounding trees begin to leaf out in the spring, you may need to supplement lighting. Ideally, I would have a fluorescent light with one warm and and one cool spectrum bulb, but for now I have a regular bulb-sized "plant light." I use a timer so the light comes on and goes off at certain times,making sure the plants get a full 8 hours of light. If the area where you will have your seeds is on the cooler side, you may want a waterproof heating pad to put under your containers to keep your seeds nice and cozy.
Once the seedlings are tall enough to touch the transparent cover, you can remove it. Make sure to continue to keep the roots of the plants moist.
When you are ready to move the seeds to your garden you will need to "harden them off," or get them used to the weather outside first. Take your seedlings and set them outside for a couple of hours everyday, increasing their time outside each day. If the leaves start turning white, they are getting too much sun at the time and need to be brought in immediately. Seedlings take time to adapt to the sunlight. Once they have fully adapted they can be transplanted.
Lastly, I will talk about fertilizing. Typically, you can start fertilizing seeds when they develop their first "true leaves." Those two initial oval shaped leaf things that most seedlings have aren't actually leaves. They are called cotyledons, which are part of the seed embryo. They provide food to the seedling until it develops its true leaves and can perform photosynthesis. Wait for the seed's true leaves before fertilizing.
Fertilizer Options:
- Synthetic Fertilizer should be diluted to half the amount recommended on the label. You could probably get away with 1/4. Feed weekly.
- Organic fertilizers come in liquid form, granular, fish emulsion, kelp, and worm castings. Feed weekly to bi-weekly. (I plan to use a mixture of kelp and worm castings if necessary).
love & light,
Claire


